前情提要
在某五个字音乐软件支持逐字歌词之后, 我们也赶紧给 HyPlayer 适配了逐字歌词, 但是由于时间原因, 第一版非常粗暴, 对于每一个 Word (Word 可能包含多个字符) 创建一个 TextBlock, 然后在再监听时间轴, 对其 Foreground 进行修改, 之后经过几次更改, 加上了 ColorAnimation, 达到了一种渐变的效果

这个固然达到了逐字歌词的效果, 但是在其他家清一色的高亮扫词的方案中又显得比较简陋而格格不入. 于是我们开始了重构.
本文中部分代码来自 Betta Fish ( @BettaFish )
准备工作
在 @叫我蓝火火 (热词开发者) 的建议下, 我们准备使用 Win2D 来对逐字歌词进行实现. Win2D 具有超高的自由度, 也能高效的完成绘图操作.
顺便一说, LyricEase 使用的是 Composition , 完成度很高, HyPlayer 相形见绌.
开始
方案一
我们首先打算渲染两层 Text, 未高亮的在底部, 高亮的在其上方对其覆盖以此来达到扫词的效果
我们单独定义了一个控件来存放歌词, 这样方便进行复用, 一如既往干净的 XAML 文件
<UserControl
    x:Class="HyPlayer.Controls.LyricControl.LyricControl"
    xmlns="http://schemas.microsoft.com/winfx/2006/xaml/presentation"
    xmlns:x="http://schemas.microsoft.com/winfx/2006/xaml"
    xmlns:local="using:HyPlayer.Controls.LyricControl"
    xmlns:d="http://schemas.microsoft.com/expression/blend/2008"
    xmlns:mc="http://schemas.openxmlformats.org/markup-compatibility/2006"
    xmlns:xaml="using:Microsoft.Graphics.Canvas.UI.Xaml">
    <xaml:CanvasAnimatedControl x:Name="CanvasControl" HorizontalAlignment="Stretch" VerticalAlignment="Stretch" />
</UserControl>
接下来就是在代码中控制渲染了.
private void CanvasControl_Draw(Microsoft.Graphics.Canvas.UI.Xaml.ICanvasAnimatedControl sender,
    Microsoft.Graphics.Canvas.UI.Xaml.CanvasAnimatedDrawEventArgs args) {
    using(var textFormat = new CanvasTextFormat {
            FontSize = _fontSize,
            HorizontalAlignment = _horizontalTextAlignment,
            VerticalAlignment = _verticalTextAlignment,
            Options = CanvasDrawTextOptions.EnableColorFont,
            WordWrapping = CanvasWordWrapping.Wrap,
            Direction = CanvasTextDirection.LeftToRightThenTopToBottom,
            FontStyle = _fontStyle,
            FontWeight = _fontWeight,
            FontFamily = _textFontFamily
    })
    using(var textLayout = new CanvasTextLayout(args.DrawingSession, _lyric.LyricLine.CurrentLyric, textFormat, (float) sender.Size.Width, (float) sender.Size.Height)) {
        // Drawing code goes here
    }
}
先定义好渲染的文字样式, 创建 TextLayout
NoWrap 默认禁用了多行, 在后文会增加多行的支持.
通过 TextLayout, 我们可以很方便的获取到每一个字符渲染的位置和大小, 可以由此来获取到高亮的宽度
private double GetCropWidth(TimeSpan currentTime, ILyricLine lyric, CanvasTextLayout textLayout) {
    if (lyric is KaraokeLyricsLine kLyric) {
        var wordInfos = (List<KaraokeWordInfo>) kLyric.WordInfos;
        var time = TimeSpan.Zero;
        // 默认是最后一个 Word
        var currentLyric = wordInfos.Last();
        // 累计单词时间
        foreach(var item in wordInfos) {
            if (item.Duration + time > currentTime) {
                currentLyric = item;
                break;
            }
            time += item.Duration;
        }
        // 获取当前单词的位置
        var index = wordInfos.IndexOf(currentLyric);
        // 获取之前的单词的字符数目 (因为一个单词可为多个字符)
        var position = wordInfos.GetRange(0, index).Sum(p => p.CurrentWords.Length);
        // 累计开始时间
        var startTime = TimeSpan.FromMilliseconds(wordInfos.GetRange(0, index).Sum(p => p.Duration.TotalMilliseconds));
        // 累计已经播放的字符的长度
        var playedWidth = textLayout.GetCharacterRegions(0, position).Sum(p => p.LayoutBounds.Width);
        //获取正在播放单词的长度
        var currentWidth = textLayout.GetCharacterRegions(position, currentLyric.CurrentWords.Length).Sum(p => p.LayoutBounds.Width);
        //计算占比
        var playingWidth = (currentTime - startTime) / currentLyric.Duration * currentWidth;

        //求和
        var width = playedWidth + playingWidth;

        if (width is < 0 or null)
            width = 0;

        return width;
    } else {
        return textLayout.LayoutBounds.Width;
    }
}
我们再使用 CropEffect 对高亮的字符进行裁剪
var accentLyric = new CropEffect {
    Source = cl,
    SourceRectangle = new Rect(textLayout.LayoutBounds.Left, textLayout.LayoutBounds.Top, GetCropWidth(_currentTime, _lyric.LyricLine, textLayout), textLayout.LayoutBounds.Height),
};
此时就可以开始依次渲染两层歌词了
args.DrawingSession.DrawTextLayout(textLayout, 0, 0, _lyricColor);
args.DrawingSession.DrawImage(accentLyric);
看起来效果还不错的, 我们就实现了这个效果.
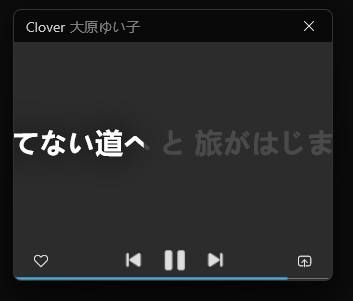
在原本的代码中, Betta Fish 大佬同时还加了阴影效果, 显示的效果更佳舒适.
等等, 我们是不是忘了什么?
方案二
对于多行的支持似乎被我们忘记了, 如果超出了绘图边界的内容将会看不到, 这实在是坏了一锅汤.
但是对于方案一, 我们只能采用矩形进行裁切, 如果遇到第二行的话, 无法做到只高亮几个单词
我们只能换一种想法来进行高亮了.
我们将目光转向 Win2D Gallary, 发现 TextLayout 的示例

每一个字都会有一个字框将其完全包裹住, 如果我们将高亮字符的字框矩形给组合起来, 与字符取交集, 是否就可以构成高亮的字符图形了?
想法成立, 接下来开始实现.
首先我们仍然需要把叠底的字符给画上
args.DrawingSession.DrawTextLayout(textLayout, 0, 0, _lyricColor);接下来就是获取高亮的字符的矩形集合了, 我们这里用到了 CanvasGeometry
private CanvasGeometry CreateHighlightGeometry(TimeSpan currentTime, ILyricLine lyric,
    CanvasTextLayout textLayout, ICanvasResourceCreator drawingSession) {
    if (lyric is KaraokeLyricsLine karaokeLyricsLine) {
        var wordInfos = (List<KaraokeWordInfo>) karaokeLyricsLine.WordInfos;
        var time = TimeSpan.Zero;
        var currentLyric = wordInfos.Last();
        var geos = new HashSet<CanvasGeometry>();
        //获取播放中单词在歌词的位置
        foreach(var item in wordInfos) {
            if (item.Duration + time > currentTime) {
                currentLyric = item;
                break;
            }

            time += item.Duration;
        }

        var index = wordInfos.IndexOf(currentLyric);
        var letterPosition = wordInfos.GetRange(0, index).Sum(p => p.CurrentWords.Length);

        // 获取高亮的字符区域集合
        var regions = textLayout.GetCharacterRegions(0, letterPosition);
        foreach(var region in regions) {
            // 对每个字符创建矩形, 并加入到 geos
            geos.Add(CanvasGeometry.CreateRectangle(drawingSession, region.LayoutBounds));
        }

        // 获取当前字符的 Bound
        var currentRegions = textLayout.GetCharacterRegions(letterPosition, currentLyric.CurrentWords.Length);
        if (currentRegions is { Length: > 0 }) { // 加个保险措施
            var startTime = TimeSpan.FromMilliseconds(wordInfos.GetRange(0, index).Sum(p => p.Duration.TotalMilliseconds));
            // 计算当前字符的进度
            var currentPercentage = (index == wordInfos.Count - 1 || currentLyric.Duration.TotalSeconds > 1) ? _easeFunction.Ease((_currentTime - startTime) / currentLyric.Duration) : (_currentTime - startTime) / currentLyric.Duration;
            // 创建矩形
            var lastRect = CanvasGeometry.CreateRectangle(
                drawingSession, (float) currentRegions[0].LayoutBounds.Left, (float) currentRegions[0].LayoutBounds.Top, (float)(currentRegions.Sum(t => t.LayoutBounds.Width) * currentPercentage), (float) currentRegions.Sum(t => t.LayoutBounds.Height));
            geos.Add(lastRect);
        }
        // 拼合所有矩形
        return CanvasGeometry.CreateGroup(drawingSession, geos.ToArray());
    } else {
        // 创建整体字符的矩形
        return CanvasGeometry.CreateRectangle(drawingSession, (float) textLayout.LayoutBounds.Left, (float) textLayout.LayoutBounds.Top, (float) textLayout.LayoutBounds.Width, (float) textLayout.LayoutBounds.Height);
    }
}
这个会返回高亮的字符的矩形, 就像这样
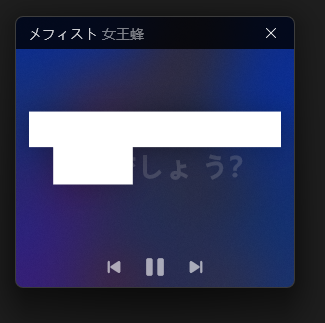
然后我们把它与字符取交集, 就可以把高亮字符算出
// 获取单词的高亮 Rect 组
var highlightGeometry = CreateHighlightGeometry(_currentTime, _lyric.LyricLine, textLayout, args.DrawingSession);
var textGeometry = CanvasGeometry.CreateText(textLayout);
var highlightTextGeometry = highlightGeometry.CombineWith(textGeometry, Matrix3x2.Identity, CanvasGeometryCombine.Intersect);
args.DrawingSession.FillGeometry(highlightTextGeometry, _accentLyricColor);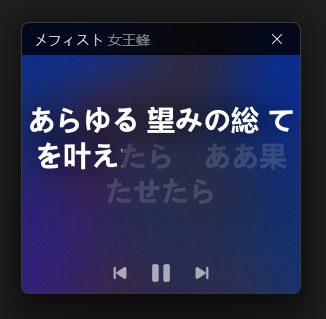
于是, 我们就实现了支持多行的逐字歌词
方案三
与 Composition 耦合 (未完待续)
咕咕咕
后记
弄了这么久, 总算是实现了效果. Win2D 真的用着挺舒服的, 可以轻松实现很多效果
最后感谢一下:


